MarfeelPress Troubleshooting Guide
This MarfeelPress Troubleshooting Guide provides extensive information about resolving problems that you might experience with MarfeelPress. Click on the links below to resolve the problems that you may sometimes encounter.
Before Activating your Mobile Version
Note: Once you have activated your Marfeel plugin, you will still need to activate your Marfeel mobile version. To activate your mobile version, you will need to enter the parameters for the 'Look & Feel', 'Sections' and 'Analytics' tabs.
Look & Feel
How do I add my logo?
To define the prominent logo that will appear over the web in your Marfeel mobile site:
1.In your WordPress Dashboard, click MarfeelPress in the side panel. The following screen appears:
2. Click Look & Feel.
3. Drag your logo image or search in your browser. Note: Your image be a transparent PNG or SVG file with a minimum size of 80px by 80px. (The recommended size is 200px by 80px.)
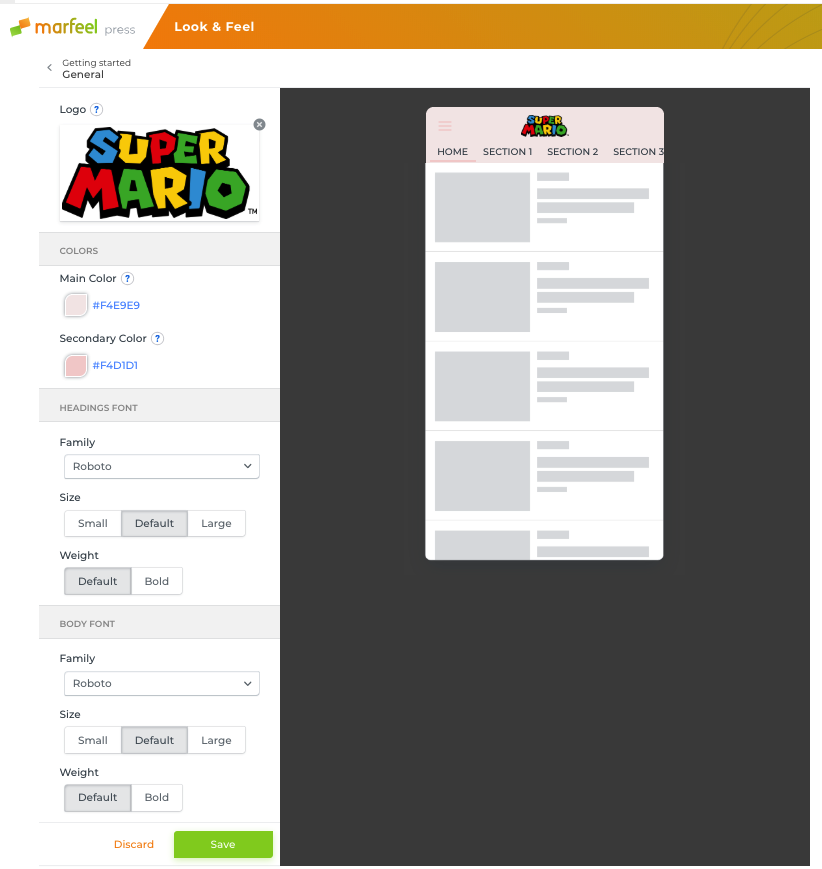
4. Click Save.
How do I change the colors of my website?
To define the prominent logo that will appear over the web in your Marfeel mobile site:
1.In your WordPress Dashboard, click MarfeelPress in the side panel. The following screen appears:
2. Click Look & Feel.
3. You can modify the main color as well as the secondary color by either selecting the color from the color picker or entering the 6-digitDrag your logo image or search in your browser. Note: Your image be a transparent PNG or SVG file with a minimum size of 80px by 80px. (The recommended size is 200px by 80px.)
4. Click Save.
How do I change the font of the headings and the body?
To change of the font of the headings and the body:
1.In your WordPress Dashboard, click MarfeelPress in the side panel. The following screen appears:
2. Click Look & Feel.
3. You can modify the Main color as well as the secondary color by either selecting the color from the color picker or entering the 6-digitDrag your logo image or search in your browser. Note: Your image be a transparent PNG or SVG file with a minimum size of 80px by 80px. (The recommended size is 200px by 80px.)
4. Click Save.
Sections
How can I create sections?
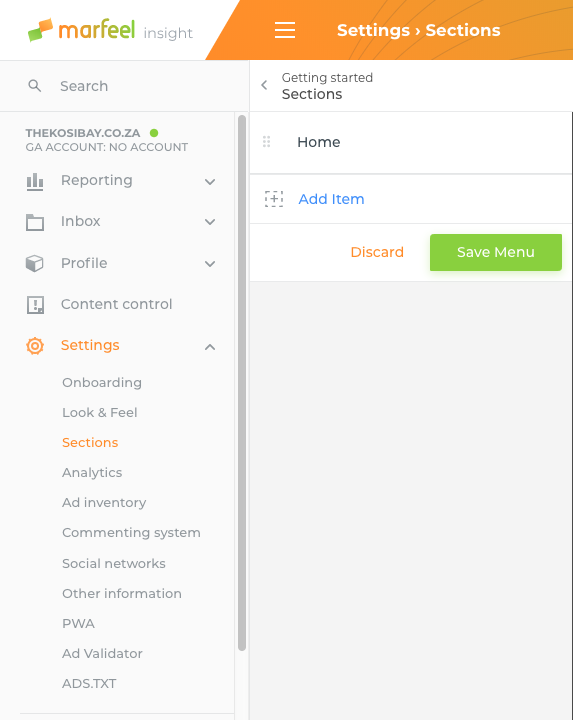
1.In your WordPress Dashboard, click MarfeelPress in the side panel and then Sections. The following screen appears:
2. The default section is the Home section. Click on the pencil icon if you want to modify it.
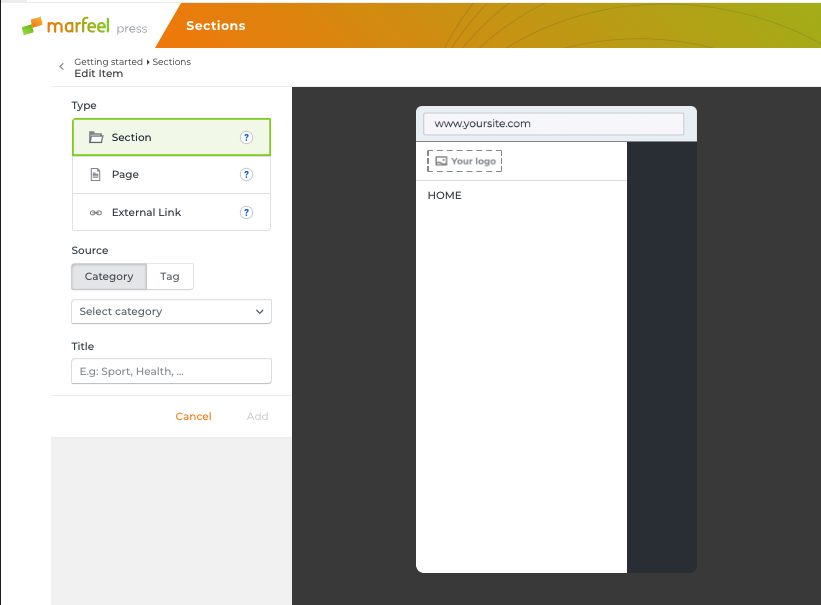
3. Click Add Item. The following screen appears: (You can add Sections, Pages or External Links)
Sections
- Choose the Section option to see the section 'Marfeelized'.
- Select the Category (the title of the category will appear in the Title space.)
- Click Add.
- Click Add Items to add more items or click Save Menu once you have adde all the sections.
Pages
- Choose the Page option to create 'Marfeelized' pages like 'About Us' or 'Contact'.
- Select the pages from the Pages dropdown menu.
- Click Add.
- Click Add Items to add more items or click Save Menu once you have adde all the sections.
External Links
- Choose the External Links option to load the page outside the Marfeel version.
- Select the title of the page and the URL.
- Click Add.
- Click Add Items to add more items or click Save Menu once you have adde all the sections.
Once you have added all the sections and saved the menu, the message, 'The Sections have been completely updated' will appear.
How can I create content groups (balcones)?
Content groups are groups of articles that are displayed in the section mosaic with a common header and style. They are normally used only in the main section and group articles of the same category.
To create a content group, complete the following steps:
1. In the WordPress admin area, click Settings in the left panel and then click Sections.
2. Move your mouse in the space to the right of 'Home' until you see the 'pencil' icon and click on it.
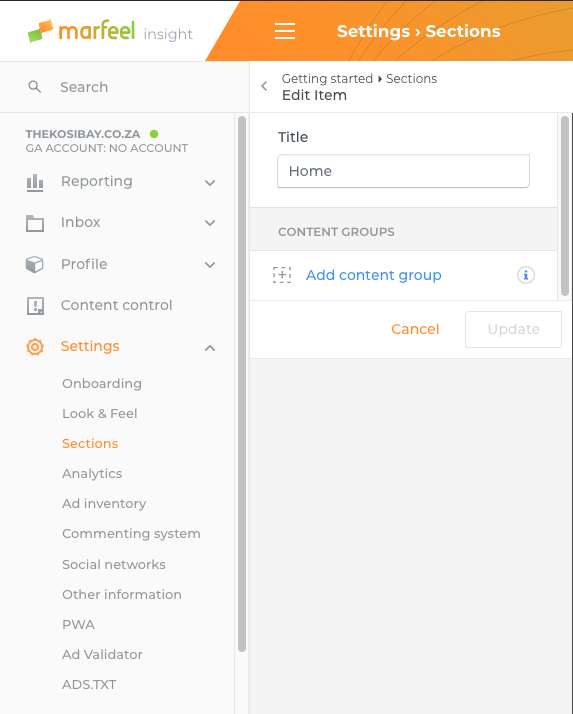
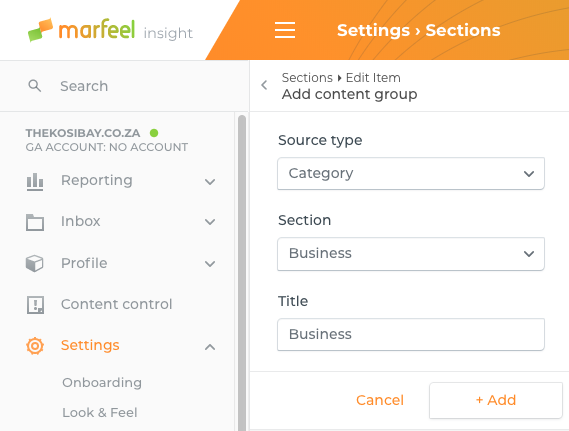
3. Click 'Add content group'.

4. Under 'Source type', select 'Category. Under Section', click the arrow and select one of the section names. That name will automatically appear in the 'Title' category.
5. Click Add to insert another balcony and repeat steps 3 and 4.
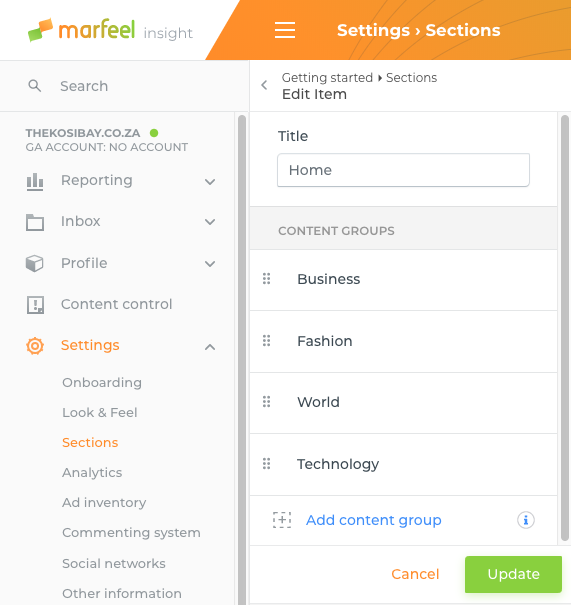
6. Once you have added all the content groups that you require, click 'Update'. Your content group headers will appear on your website.
Analytics
How can I connect my Google Analytics or other analytics providers?
1.In your WordPress Dashboard, click MarfeelPress in the side panel and then Settings.
2.Click the Analytics tab.

3. Click Add Analytics.
4. Click Google Analytics.
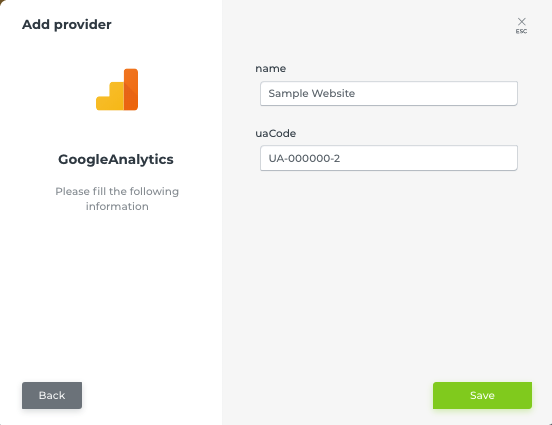
5. In the Name field, enter the property (website) associated with the account.
6. In the UA Code field, enter the tracking ID for the property you want to connect (for example, UA-xxxxxxxx-x). The UA code for your site can be found on your Google Analytics dashboard.
7. Click Save.
8. Add any other Analytics providers, if required.
9. To edit the account connected to your MarfeelPress site at any time:
a. Access the Analytics tab in the Settings for your MarfeelPress plugin.
b. Click Edit.
c. Edit the name for the account connected.
d. To delete the provider from your MarfeelPress site, click Remove.
Activating your mobile version
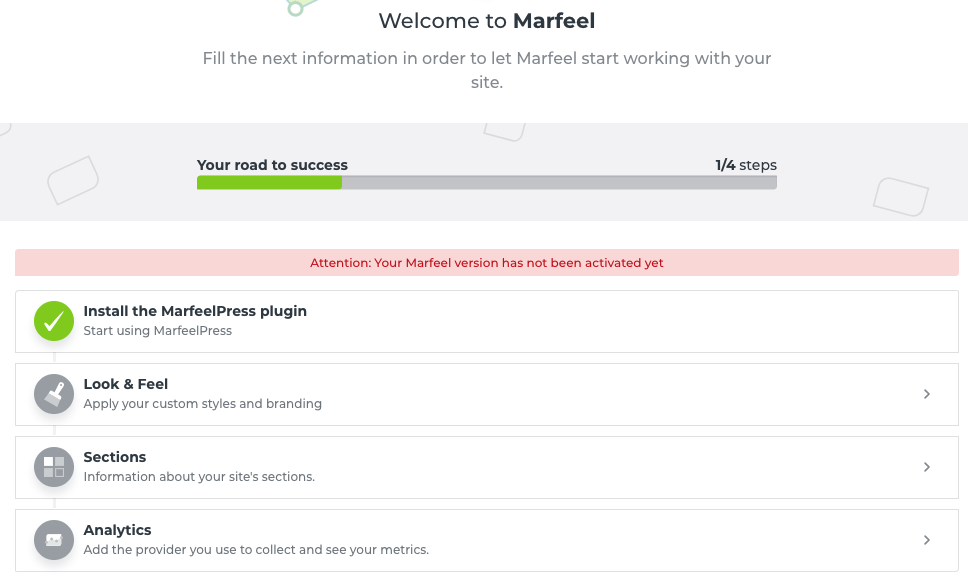
Once you have installed the Marfeel plugin, and entered the parameters for the 'Look & Feel', 'Sections' and 'Analytics' tabs, the following screen will appear:
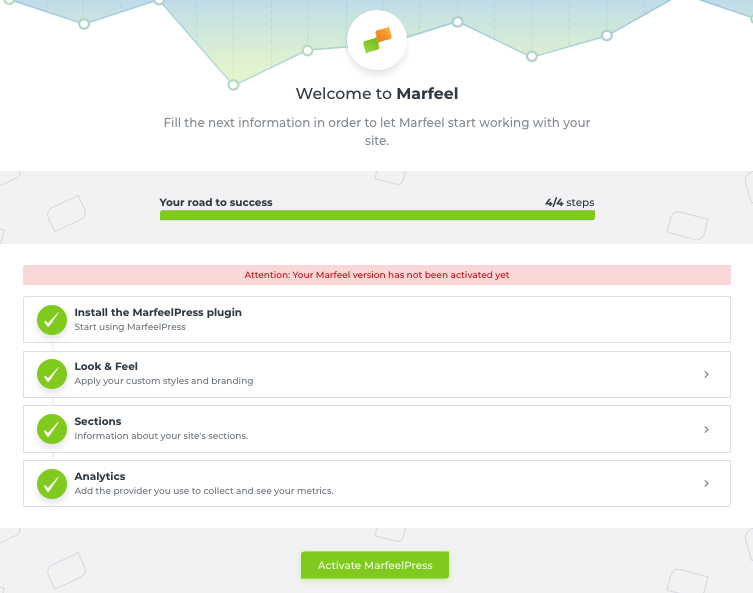
You are now almost ready to activate the Marfeel Press mobile version. Click Activate Marfeel Press. The following screen appears: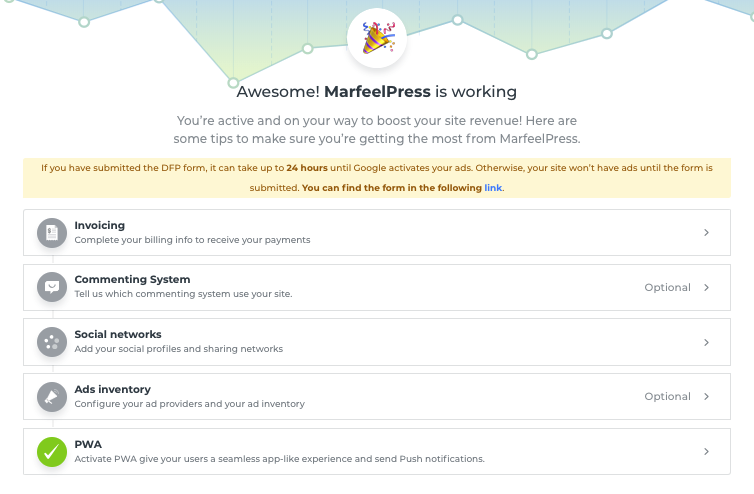
Your Marfeel mobile version is almost activated. You just need to do one more step: Registering for DFP
How do I register for DFP?
1.Before Marfeel Press can be activated on your site, you need to register for Google's DFP. Once you have clicked on the Activate Marfeel button, the following screen will appear:
2. Click on link (in blue)(just above the Invoicing tab). The following screen appears:
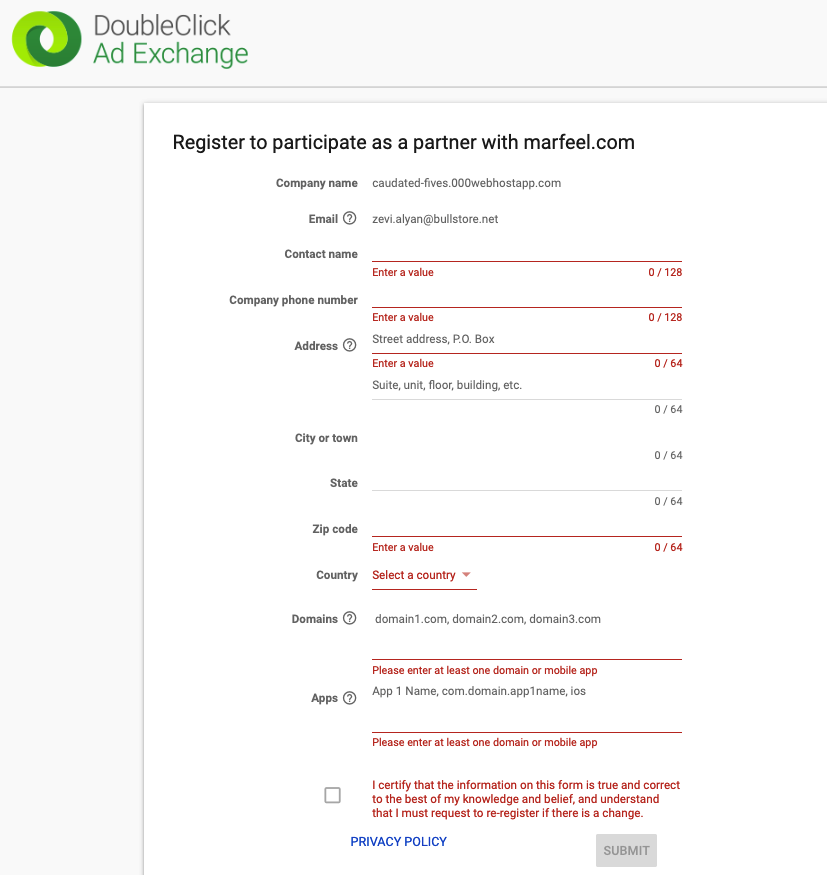
3. Fill up the fields in this form.
4. Click Submit. (Note: It may take up to 24 hours for Google to evaluate and decide whether to activate your ads.)
If Google decides to activate your ads, then, congratulations, you are on your way to boosting your site revenue.
MarfeelPress doesn't activate. What could be the reason?
Do you have more than 5 articles published?
MarfeelPress plugin requires to have a minimum of 5 articles being published on your website for it to activate.
Invoicing, billing
How can I start receiving payments?
To start receiving payments, you need to fill up the billing info form:
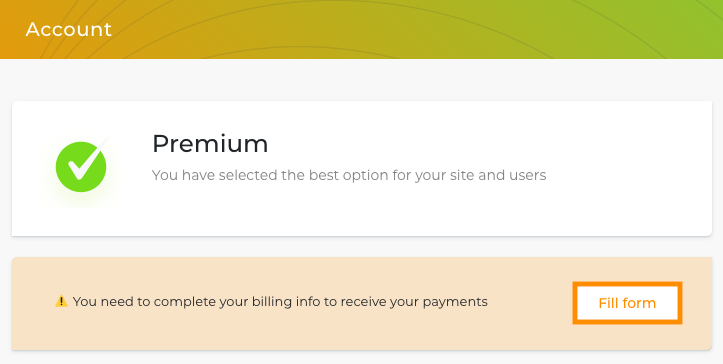
1.Click Invoicing. The following screen appears:

2. Fill up the form and click Save.
3. The next time you click on (your WordPress Dashboard) Marfeel Press>General, there will be a green tick next to Invoicing.
When will I start receiving payments?
Marfeel policy stipulates a 60 day payment period. That means that you will receive your payment 60 days after activating Marfeel.
Where can I find my invoices?
Publishers can review and access the invoices they have received by Marfeel after activating the MarfeelPress plugin and receiving payment by:
1.In your WordPress Dashboard, click MarfeelPress in the side panel and then Account.
2.Click Insight.
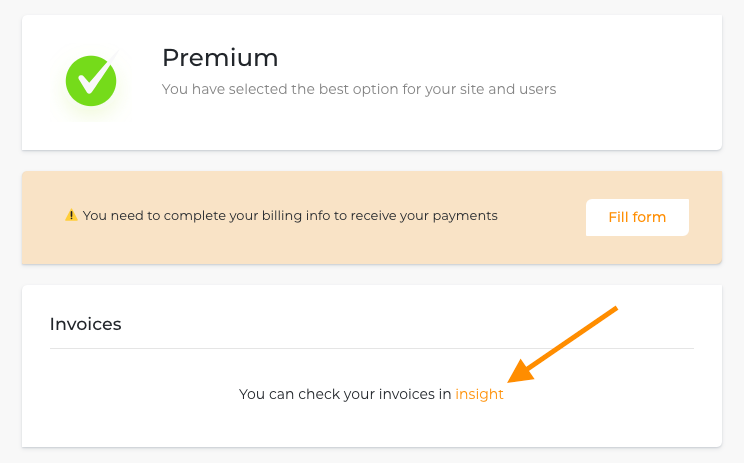
3. Your invoices are displayed and can be downloaded or printed.
Where can I obtain my billing information?
1.In your WordPress Dashboard, click MarfeelPress in the side panel and then Account.
2.Click Fill form.
Commenting system
How do I connect my commenting systems?
1.In your WordPress Dashboard, click MarfeelPress in the side panel and then Settings.
2.Click the Comments tab. The following screen appears:
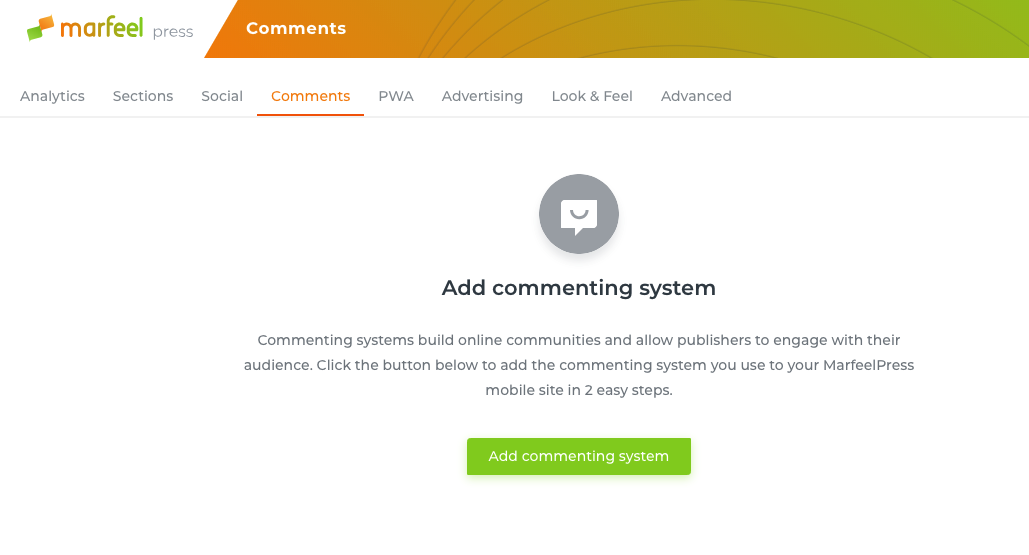
1.Click Add commenting system.
2. Click Disqus.
3. Enter the name for your account in the Name field. This refers to the name entered in your Disqus admin settings.
4. Click Submit.
5. To edit the Disqus account connected to your MarfeelPress site at any time:
a. Access the Comments tab in the Settings for your MarfeelPress plugin.
b. Click Edit.
c. Edit the name for the account connected.
d. To delete the provider from your MarfeelPress site, click Remove.
6. To add comments for Facebook and Spot.im, repeat steps 3-7 for each of them.
Social networks
Where can I put my social profiles?
To help publishers maximize how their relevant content is shared and promoted by their users on social networks, they can order and customize the sharing options that appear on the social sharing bar in their MarfeelPress site. That way, publishers can present the most popular social sharing options first, and order the rest accordingly.
To access the Sharing Options in the Customizer:
1.In your WordPress Dashboard, click MarfeelPress in the side panel and then Settings.
2. Click the Social tab.
3. Click Social Profiles to enter the user names of all your social media sites (Facebook, WhatsApp, Twitter, LinkedIn, Instagram, Pinterest) and click Save.
4. Click Social again followed by Sharing bar. The top four social channels appear in the sharing bar, displayed by their icon. The others are aggregated in the more (...) option and displayed when that button is selected.
5. To change the order of the options in the sharing bar, simply drag and drop the social channel to the position you choose.
6. Click Save to confirm your options.
Ads inventory
More information coming soon.
Ads.txt
What is ads.txt and why is it important?
ads.txt (Authorized Digital Sellers) is a project by the IAB (Interactive Advertising Bureau) to try and eliminate the sale of counterfeit inventory (or arbitrage inventory) and domain spoofing.
As a new industry standard in the digital ad ecosystem, it's crucial that all publishers create and integrate an ads.txt file to prevent any loss of revenue, strengthen the integrity of their brand, and promote transparency in programmatic advertising.
For more information on ads.txt, see this article from Google.
How does it work?
Ads.txt is a basic text file that lists all the demand providers a publisher (seller) has authorized to buy or resell their inventory.
The file is served in the publisher's root level of their domain. It must be posted there by the publisher's webmaster and is essentially a publicly accessible record.
The file specifically contains the following information for each demand provider (seller) the publisher uses in their ad configuration:
<SSP/Exchange domain>, <Your publisher ID for that provider>, <The seller's relationship with the publisher (DIRECT or RESELLER>, <The tag ID which is optional>
Marfeel's ads.txt
Marfeel's ads.txt is the following. The reason there are so many providers is a result of Marfeel's sophisticated ad setup that leverages competition among providers to maximize the value and return of a publisher's inventory:
The list can also be downloaded in .txt format here:
ads.txt info
EMXDigital (Client + S2S) |
|
|---|---|
AOL |
|
Index |
|
Index (EBDA) |
|
| Index (S2S) |
|
Google DFP |
|
Google ADX |
|
Pulsepoint |
|
Sovrn |
|
Sovrn (EBDA) |
|
Smart |
rubiconproject.com,16114,RESELLER,0bfd66d529a55807
|
Rubicon |
|
Rubicon (EBDA) |
|
Pubmatic |
|
Pubmatic (S2S) |
|
| Pubmatic (EBDA) | pubmatic.com, 157138, Reseller, 5d62403b186f2ace |
Openx |
|
Openx (EBDA) |
|
| OpenX (S2S) | openx.com, 540611310, DIRECT, 6a698e2ec38604c6 |
Appnexus | appnexus.com, 9140, RESELLER, f5ab79cb980f11d1 |
| Conversantmedia | conversantmedia.com, 41578, DIRECT appnexus.com, 4052, RESELLER |
| E-Planning | e-planning.net,41e0bb8d773dffe7,DIRECT pubmatic.com,156631,RESELLER,5d62403b186f2ace rubiconproject.com,12186,RESELLER,0bfd66d529a55807 |
| 33Across | 33across.com,0010b00002KAHzRAAX,DIRECT,bbea06d9c4d2853c rubiconproject.com,16414,RESELLER,0bfd66d529a55807 pubmatic.com,156423,RESELLER,5d62403b186f2ace appnexus.com,10239,RESELLER,f5ab79cb980f11d1 appnexus.com,1001,RESELLER,f5ab79cb980f11d1 appnexus.com,3135,RESELLER,f5ab79cb980f11d1 openx.com,537120563,RESELLER,6a698e2ec38604c6 openx.com,539392223,RESELLER,6a698e2ec38604c6 rhythmone.com,2439829435,RESELLER,a670c89d4a324e47 indexexchange.com,185506,RESELLER emxdgt.com,326,RESELLER,1e1d41537f7cad7f google.com,pub-9557089510405422,RESELLER,f08c47fec0942fa0 adtech.com,9993,RESELLER aolcloud.net,9993,RESELLER |
You can also download the list of Marfeel's authorized providers directly here:
The demand providers then use crawlers to find and integrate ads.txt files in their platforms to confirm that they are buying and reselling the inventory they are authorized to buy or resell. This allows bidders to ensure that the publisher and demand provider have an authentic connection and that they are not buying inventory from a fake domain or buying counterfeit inventory.
Implementation steps
1.If you already have an ads.txt file, copy and paste the above list of Marfeel authorized providers from and including #marfeel 010818 to your file and re-upload it.
2.If you don't have an ads.txt:
a. Download the above .txt file.
b. Add all the other providers you use for desktop and mobile starting at #your ad configuration, following the same format.
c. Upload the file to the root level of your domain (ie. https://example.com/ads.txt) similar to your robots.txt file that instructs robots on how to crawl your site.
PWA
What's PWA and what's it for?
Progressive WebApps (PWA) are the next mainstay in the mobile ecosystem.
Committed to a philosophy of continuous improvement and staying on the edge of mobile evolution, even though PWAs are the thing of tomorrow, Marfeel is providing them today so partners can immediately reap the rewards of the enhanced engagement and performance they deliver.
What is a Marfeel PWA?
A Marfeel PWA is a Marfeel mobile site that provides publishers with the following capabilities, formerly exclusive to just native applications:
- Sending push notifications in the browser to users that subscribe to them
- Enabling offline access to a publication
- Accessing a frictionless app-like experience when users add the site to their homescreen. That is, the site without an address bar and with a splash screen when it runs in the background. When the Marfeel PWA is running, it also has its own windows in the apps carousel.
- Increased page loading speed.
How can I create a PWA?
1.On your mobile website, navigate to the categories section (See image below as an example)
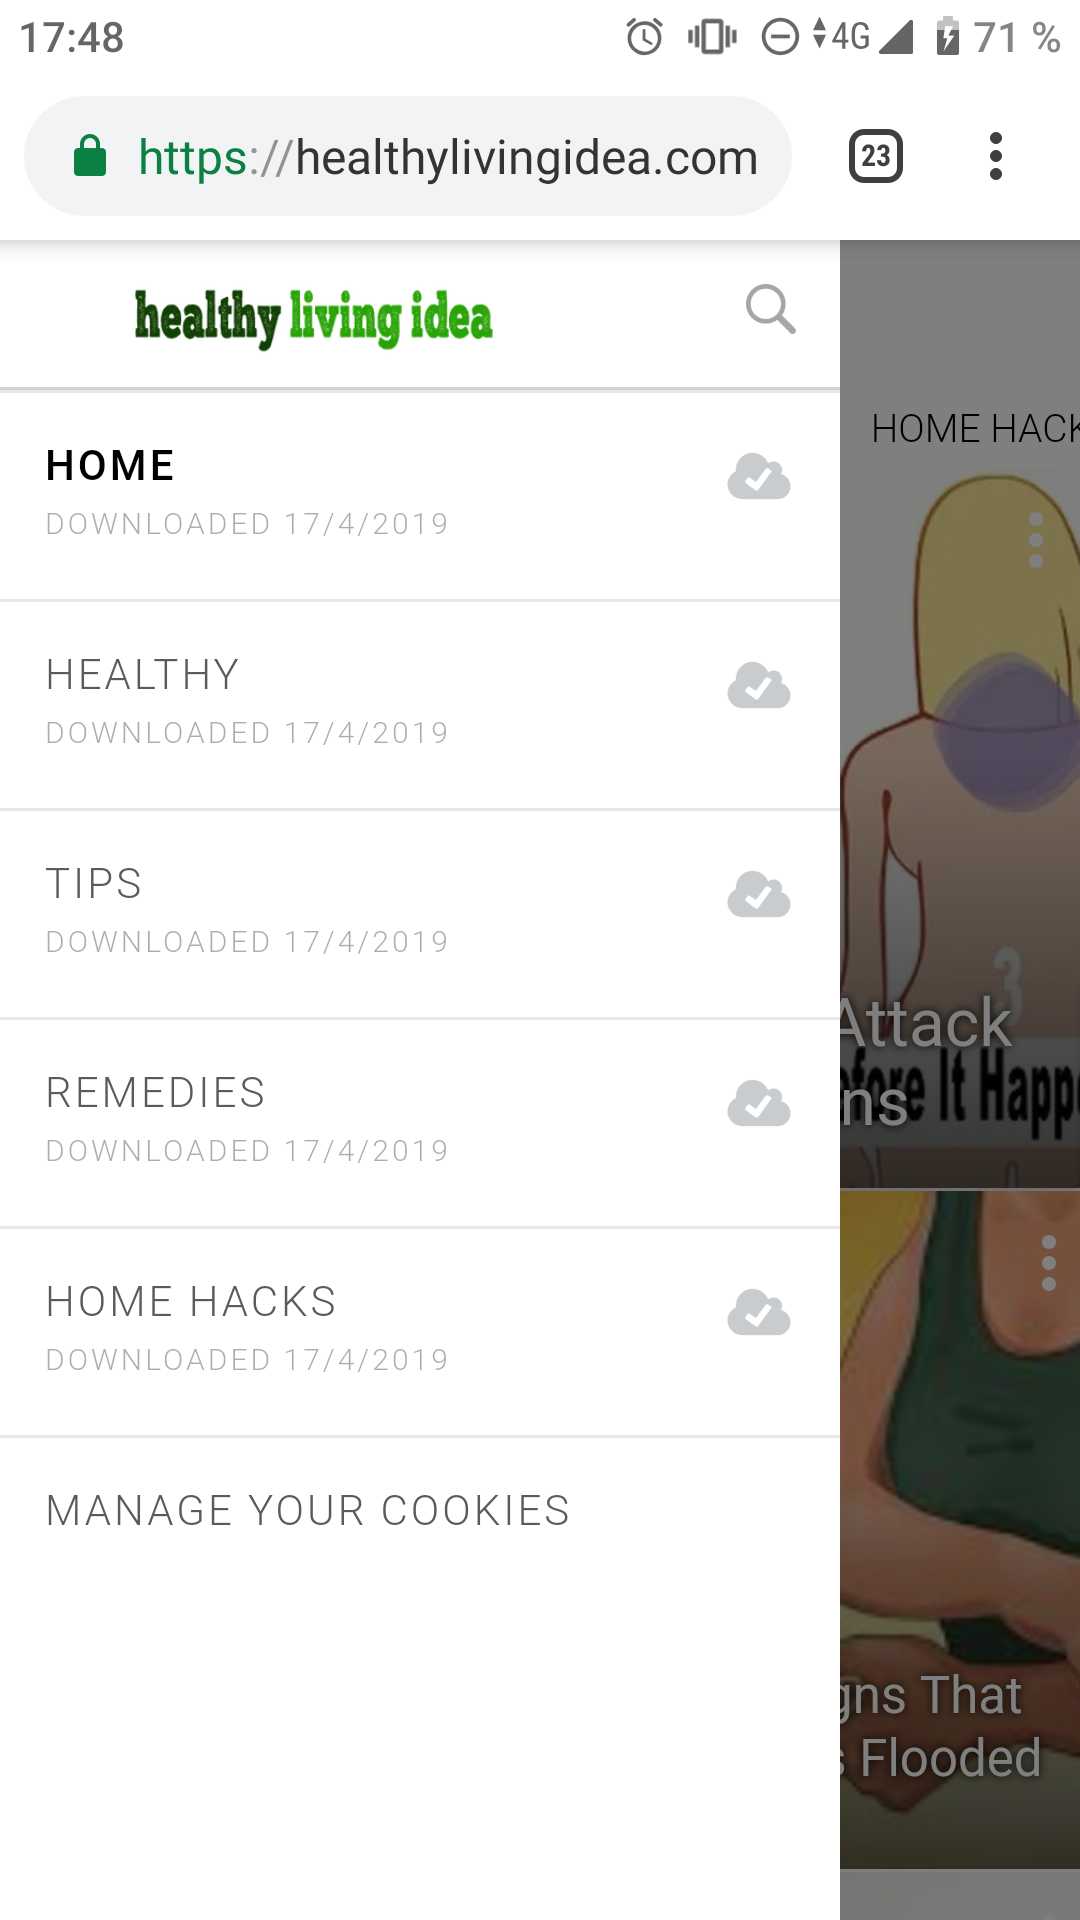
2. Download all the categories by clicking the tick to the right of each category.
3. One you leave your website, default app icon (the Marfeel logo) will created on your mobile phone.
How do I customize my App logo?
1.In your WordPress Dashboard, click MarfeelPress in the side panel and then Settings.
2.Click the PWA tab. The following screen appears:
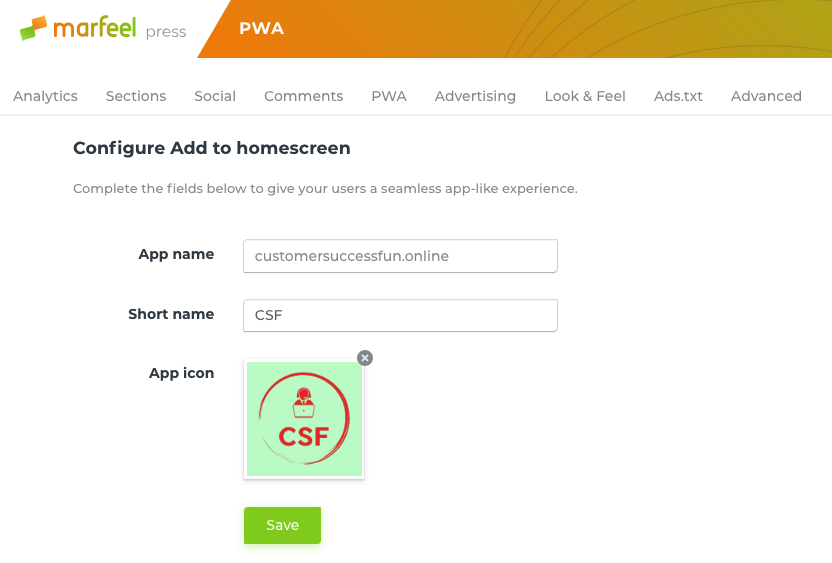
3. Enter the App name and a short name.
4. Download an image which will be your app icon. If you do not upload an image, the Marfeel logo will appear by default.
5. Click Save. Your logo will now replace the Marfeel logo as the App logo.
AMP
Google AMP (Accelerated Mobile Pages) is a technology initiative that provides a fast delivery format. A publisher's AMP pages are embedded inside google.com on both their search results and carousels.
Marfeel is an official AMP technology partner and can implement AMP pages as part of their offer - any customer that uses the Marfeel solution gets AMP pages 'off-the-shelf'.
One of the main differences between the two is that AMP is mostly used when a reader is browsing google.com, whereas Marfeel is used on the publisher's site. Another key difference is monetization; one of our core principles is to maximize revenue and optimize the yield per visit.
Moreover, Marfeel provides a comprehensive solution where lightning-quick page speed is only one component of the product. A mobile site powered by Marfeel enhances the entire user experience through its revolutionary UX design such as the swipe feature, dynamic sharing bars, galleries, a continuous reading experience, and other built-in elements that optimize user engagement and maximize ad revenue.
How do I activate AMP?
1. In your WordPress Dashboard, click MarfeelPress in the side panel and then Settings.
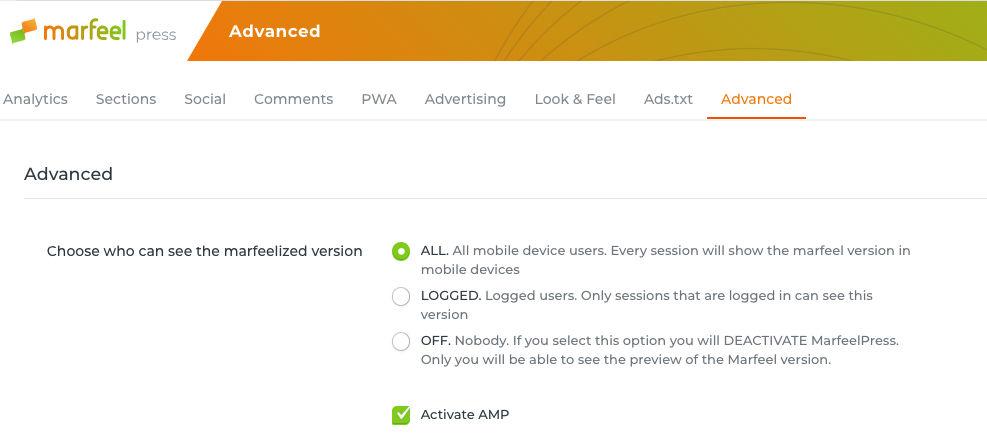
2. Click the Advanced tab.
3. Ensure that the box to the left of Activate AMP has been ticked.
How can I test to see if my AMP is working correctly?
1.Open any article on your web and at the end of the article URL place /amp and open up the link.
Eg: yourweb.com/category/article-title/ changed to yourweb.com/category/article-title/amp
2. If your view is similar to the one below, then then you have activated AMP correctly.

3. If you receive an error message, then AMP has not been activated correctly.
Push notifications
What are Push Notifications and how do I activate Marfeel's automatic Push Notifications to increase my engagement?
Push notifications are automated messages which are sent to the users of a native app or PWA (Progressive Web App) to drive visits back to the application while it is not open. It is a message that pops up on a mobile device. App publishers can send them at any time; users don't have to be in the app or using their devices to receive them. They can do a lot of things; for example, they can show the latest sports scores, get a user to take an action, such as downloading a coupon, or let a user know about an event, such as a flash sale.
Activation is automatic when you activate your PWA (see How do I activate AMP above)
Advanced
How do I test my site before going live?
1.Log on to testmysite.withgoogle.com.
2. Enter your domain to test your speed.
3. Click the arrow to the right of your domain name.
4. You site will be analysed and a report will be generated.
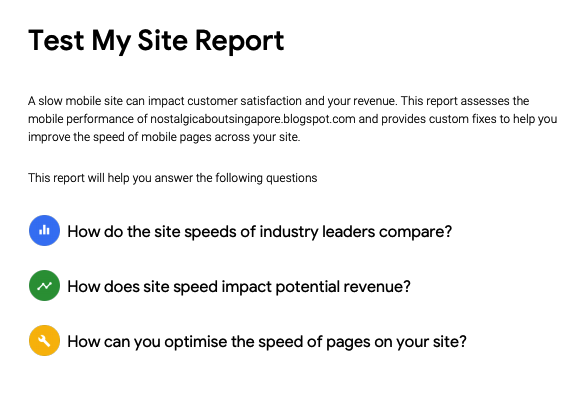
5. The report will indicate how your site speed compares with other sites in the industry, how your speed will impact your potential revenue and how you can optimise the speed of pages in your site.
Do Not Activate Warda
Note: Do not activate Warda if you have customised cache or CDN plugins.

Activate cache for MarfeelPress requests
Ensure that this box is not ticked.
Update MarfeelPress plugin automatically
Ensure that this box is ticked.
Help Marfeel to improve MarfeelPress by sending anonymous error data.
Ensure that this box is ticked.
Advertising
More information coming soon.
Content
My content is not up to date. How can I invalidate an article?
You can invalidate articles or sections that are not up to date.
1. Log on to Marfeel Insight.
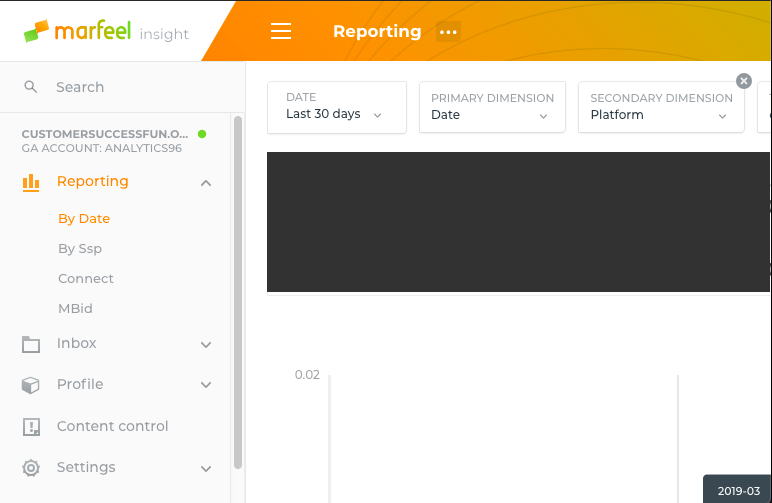
2. In the search column on the top left corner, enter your website address.
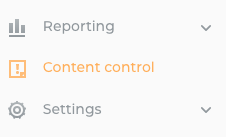
3. Click Content control.
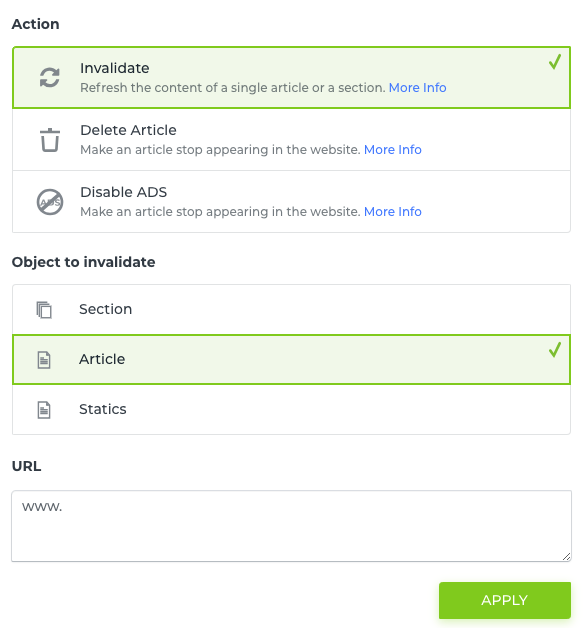
4. Click Invalidate and select the object to be invalidated (Section, Article or Statics)
5. Enter the URL of the object to be invalidated and click Apply.